|
|
Fire from a Can of Coke and a Chocolate Bar
A Wildwood Survival exclusive - featured on Mythbusters (but
it was here they got the idea)
Page and photos by Walter Muma, with some input from others
Copyright by Walter Muma
This article and photographs may not be reproduced without permission |
| |
|
Yes, you CAN make a fire from a can of coke and a chocolate bar! It really does
work -- there are emails at the bottom of this page verifying this.
This idea was originally proposed by Andre Bourbeau to Rob Bicevskis about 6 years ago. I don't know if he is the one that came up with it in the first place. Thanks to Rob
for bringing this method to my attention. The original concept was to investigate unique and unusual ways of making fire using
everyday objects that one might be carrying around, should one be stranded in the wilderness. Of course, prudent hikers will
probably be carrying a lighter or matches! :)
To make fire from a can of coke and a chocolate bar is actually quite easy, and you don't
need any tools.
However, you do need some sunlight and some tinder when you're actually ready to start a fire!
For the doubters reading this page, at the bottom are comments from people who have actually
done it. In addition, Rob Bicevskis, who passed this concept on to me, has done it. It's his hands you see in the demo farther down the page.
Please also see his article, "Fire by Cans, Part II".
This page has been translated into Chinese (translation by eVan) - CLICK HERE
Please also read "Fire by Cans, Part II", for more info on this fascinating topic! |
|
|
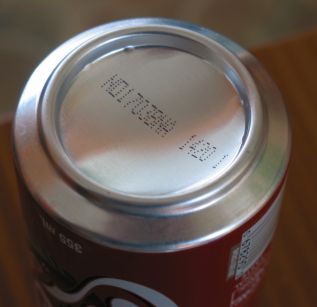 |
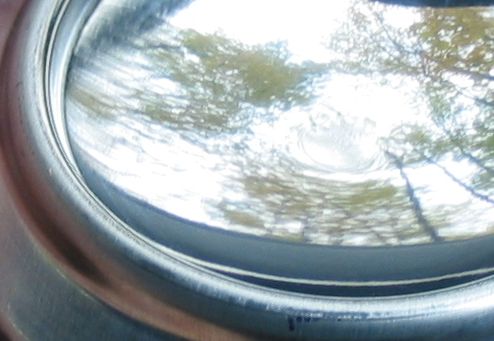
The can....
The key to this is the bottom of the coke can (by the way, any pop can will do), which is ideal for
reflecting and concentrating the sun's light and energy.
Here is a photo of a coke can bottom. Note that it has a slightly dull finish. In its present condition
it is not shiny enough to concentrate the sun's rays enough to ignite tinder.
That's where the chocolate bar comes in ....
| |
| |
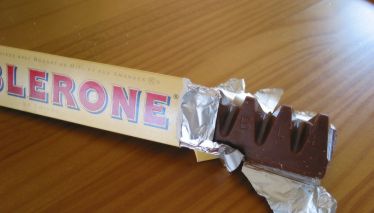 |
The chocolate bar....
The can bottom is not shiny enough to function as a good reflector and concentrator of sunlight. It
needs polishing. The chocolate does an excellent job of this. So, simply break off a piece of chocolate and use it to polish
up the can bottom!
P.S. Any type of chocolate will do. Probably the purer it is, the better. In that case, maybe a Toblerone
bar isn't so great, as it has nuts and honey in it.
| |
| |
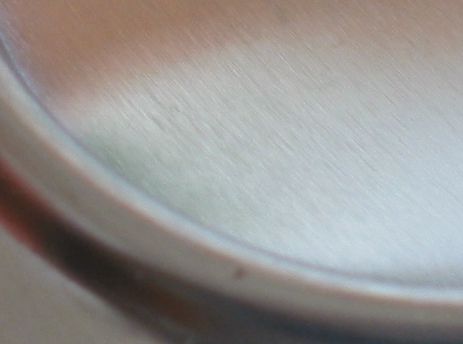 |
This is a close-up of the surface of an un-polished can's bottom. Note the fine straight lines in the
aluminum.
These fine lines on the unpolished can are actually the grain of the aluminum roll stock
from which the can is made, indicating a small degree of surface roughness which limits the can's reflectivity. These
scatter the sun's rays, and prevent them from being focused together into a single bright point.
This is why the can needs polishing.
Compare this to the picture below of a polished can bottom. | |
| |
 |
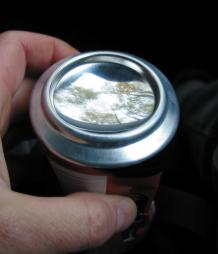
Here is a close-up of a polished can bottom.
Compare this to the picture above of an un-polished can bottom. There's a big difference.
How can you tell when it's polished enough? What you are looking for is a "mirror" finish. An object
placed near the bottom of the can should produce a clear (although distorted) image.
| |
| |
A note from A. Robinson, via email:
"DO NOT eat the chocolate after you have used it
to polish the can! It will pick up aluminum from the can, which is toxic. I've done metalwork with aluminum, and you're actually
supposed to handle it with gloves, since it leaves a black toxic residue on your skin. Once it has been exposed to air for
a few hours, aluminum is safe to handle because it forms an oxide layer on the surface which is non-toxic. But polishing it
will remove the oxide layer and expose bare metal, and the chocolate will definitely pick up some aluminum. Not a mortal danger,
but not the best thing in the world to eat!" |
|
|
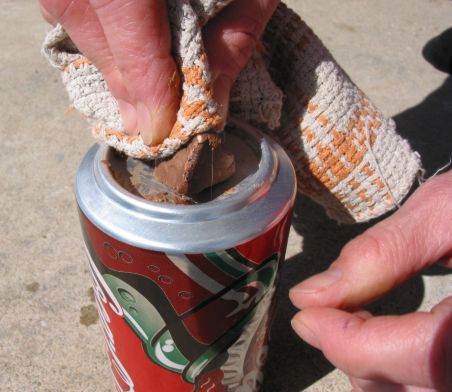 |
Polishing the bottom of the can.
Note: For polishing the can, one needs to use the wrapper (or something else) in the process.
Just rubbing chocolate on the bottom of the can won't do too much. The process is to smear some chocolate on the bottom, then
use the wrapper (or whatever) as a "cloth" to do the polishing. Every now and then, one needs to add a bit more of the "abrasive."
As a reference point, it will probably take ½-1 hour or more to finish the process.
Toothpaste also works as a good polish.
Using the chocolate bar holds to the initial challenge - but using fine steel wool, some
sort of cleanser or other polishing compound gives much more rapid results. Jeweller's rouge will get the bottom of
the can to a mirror finish in a few minutes. Chocolate at best would take an hour! | |
|
|
|
|
|
|
|
|
|
|
|
|
|
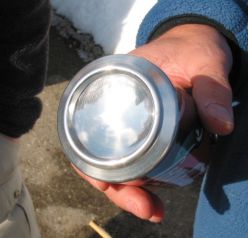
All polished and shiny.
Note that other polishing agents will work as well, such as toothpaste, powder cleansers,
etc. | |
|
|
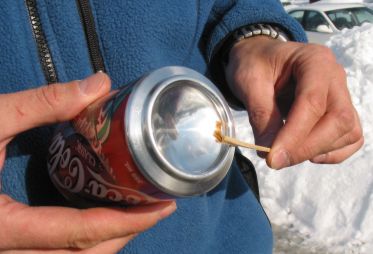 |
How to actually make fire...
On a sunny day (yes, you do need sunlight!), Hold a piece of suitable tinder, such as a fragment of
tinder fungus, at the focal point of the can bottom -- about 1 - 1.25" away from the center of the "bowl".
One doesn't need to use tinder fungus. To keep to the core of the challenge, one can use pieces
of the chocolate wrapper to get a coal. If the chocolate bar has a black paper insert, this is of course the best due to the
dark colour. It takes a bit longer with the wrapper - but, as with a magnifying glass, many things can be used. | |
| |
It is important to orient the bottom of the can towards the sun. If the bottom of the
can is "off-axis"
from the sun, then the the light gathering will be less optimal.
To make sure that you are finding the optimal focal point, try using some black newspaper. Take a small
strip, and move it towards the focal point. As you move the paper in and out, you should be able to see the light converge
to a small point. At this time, the newspaper should start to smoke. Wearing sunglasses is suggested. It protects the eyes
and also reduces the intensity of the light so that it is easier to identify the sharpest focus. CLICK HERE for more info and photos of how to do this. |
| |
|

|
Holding the small piece of tinder fungus is easier with a long thin stick with a small split in the end, such as is shown in this photos.
Other materials can be used as tinder.
Eye safety tip:
Stand facing away from the sun (facing your shadow) and hold the can above your head so that you are
looking at the bottom of the tinder and the side of the can instead of the top of the tinder and the mirror. Move the tinder
to find the brightest spot. (Thanks to Thomas for this tip) | |
|
|
|

|
After a very short time (only a few seconds in the bright sun), the tinder fungus will be smouldering. Then transfer it to a tinder bundle and blow it into flame (if you're using a large
enough piece of tinder fungus). If you're using a very small piece, then transfer the ember to a larger piece by holding the two pieces
together and blowing on them.
Alternatively, you could use a small bundle of very volatile tinder.
For more info about Tinder, click here.
| |
|
|
|
... And that's all there is to it! |
|